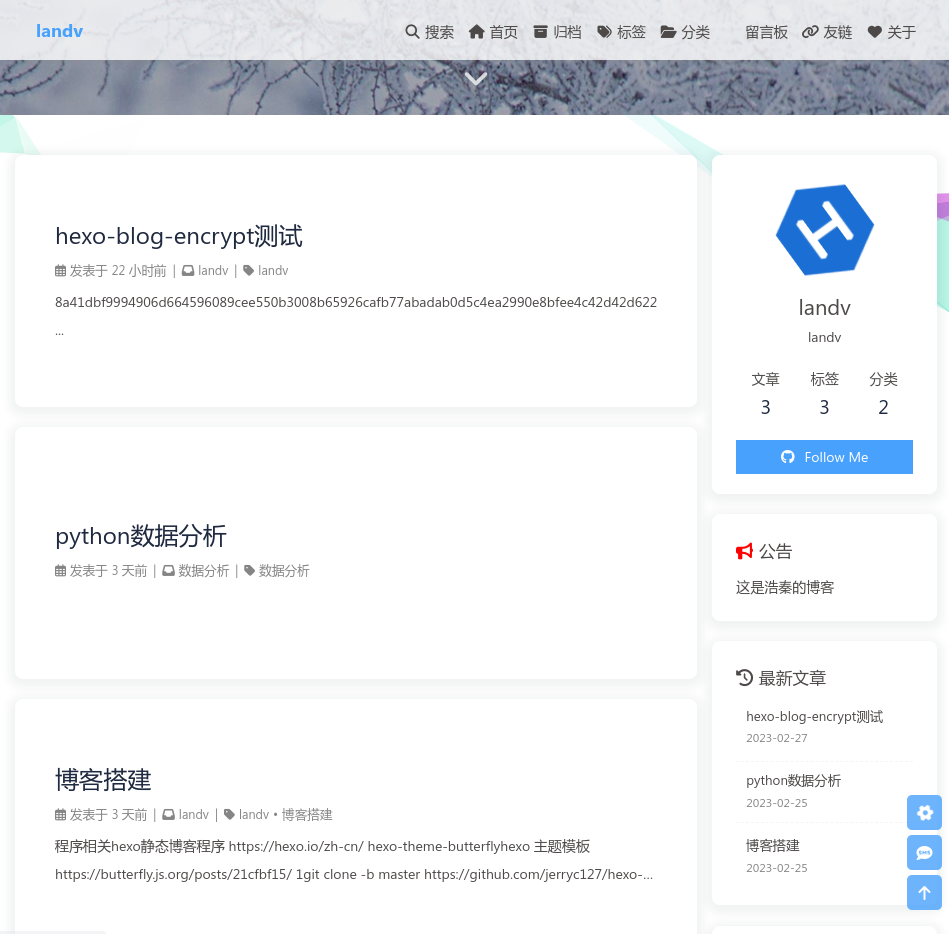
博客搭建
程序相关
hexo
静态博客程序 https://hexo.io/zh-cn/
hexo-theme-butterfly
hexo 主题模板 https://butterfly.js.org/posts/21cfbf15/
1 | git clone -b master https://github.com/jerryc127/hexo-theme-butterfly.git themes/butterfly |
waline
https://github.com/walinejs/waline
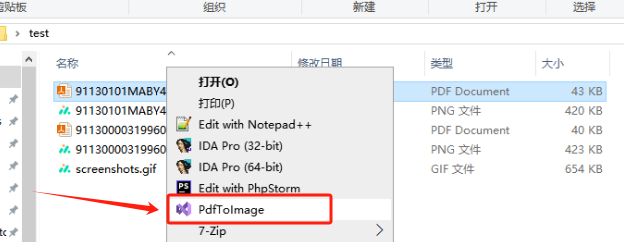
hexo-asset-image
修改版本的hexo插件,用于修复本地图片路径错误问题。
https://github.com/landv/hexo-asset-image
post_asset_folder: true
部署依赖环境
github
git服务,依赖环境中只有它是不需要付费的。
腾讯cdn
https://cloud.tencent.com/product/cdn
内容分发网络 CDN
内容分发网络(Content Delivery Network,CDN)通过将站点内容发布至遍布全球的海量加速节点,使其用户可就近获取所需内容,避免因网络拥堵、跨运营商、跨地域、跨境等因素带来的网络不稳定、访问延迟高等问题,有效提升下载速度、降低响应时间,提供流畅的用户体验。
腾讯云函数
https://cloud.tencent.com/product/scf
云函数 SCF
云函数(Serverless Cloud Function,SCF)是腾讯云为企业和开发者们提供的无服务器执行环境,帮助您在无需购买和管理服务器的情况下运行代码。您只需使用平台支持的语言编写核心代码并设置代码运行的条件,即可在腾讯云基础设施上弹性、安全地运行代码。云函数是实时文件处理和数据处理等场景下理想的计算平台。
腾讯云mysql
https://cloud.tencent.com/product/cynosdb
TDSQL-C MySQL 版
TDSQL-C MySQL 版(TDSQL-C for MySQL)是腾讯云自研的新一代云原生关系型数据库。融合了传统数据库、云计算与新硬件技术的优势,100%兼容 MySQL,为用户提供极致弹性、高性能、高可用、高可靠、安全的数据库服务。实现超百万 QPS 的高吞吐、PB 级海量分布式智能存储、Serverless 秒级伸缩,助力企业加速完成数字化转型。
部署主要步骤
注册腾讯云并开通云函数以及数据库。
腾讯云云函数部署walien
云函数主要内容
1
2
3
4
5
6
7
8
const Waline = require('@waline/vercel');
const app = Waline({
async postSave(comment) {
// do what ever you want after save comment
},
});
require('http').createServer(app).listen(process.env.PORT || 9000);TDSQL-C MySQL
https://github.com/walinejs/waline/blob/main/assets/waline.sql
1
2
3
4
5
6
7
8
9
10
11
12
13
14
15
16
17
18
19
20
21
22
23
24
25
26
27
28
29
30
31
32
33
34
35
36
37
38
39
40
41
42
43
44
45
46
47
48
49
50
51
52
53
54
55
56
57
58
59
60
61
SET NAMES utf8mb4;
CREATE TABLE `wl_Comment` (
`id` int(11) unsigned NOT NULL AUTO_INCREMENT,
`user_id` int(11) DEFAULT NULL,
`comment` text,
`insertedAt` timestamp NULL DEFAULT CURRENT_TIMESTAMP,
`ip` varchar(100) DEFAULT '',
`link` varchar(255) DEFAULT NULL,
`mail` varchar(255) DEFAULT NULL,
`nick` varchar(255) DEFAULT NULL,
`pid` int(11) DEFAULT NULL,
`rid` int(11) DEFAULT NULL,
`sticky` boolean DEFAULT NULL,
`status` varchar(50) NOT NULL DEFAULT '',
`like` int(11) DEFAULT NULL,
`ua` text,
`url` varchar(255) DEFAULT NULL,
`createdAt` timestamp NULL DEFAULT CURRENT_TIMESTAMP,
`updatedAt` timestamp NULL DEFAULT CURRENT_TIMESTAMP,
PRIMARY KEY (`id`)
) ENGINE=InnoDB DEFAULT CHARSET=utf8mb4;
CREATE TABLE `wl_Counter` (
`id` int(11) unsigned NOT NULL AUTO_INCREMENT,
`time` int(11) DEFAULT NULL,
`reaction0` int(11) DEFAULT NULL,
`reaction1` int(11) DEFAULT NULL,
`reaction2` int(11) DEFAULT NULL,
`reaction3` int(11) DEFAULT NULL,
`reaction4` int(11) DEFAULT NULL,
`reaction5` int(11) DEFAULT NULL,
`reaction6` int(11) DEFAULT NULL,
`reaction7` int(11) DEFAULT NULL,
`reaction8` int(11) DEFAULT NULL,
`url` varchar(255) NOT NULL DEFAULT '',
`createdAt` timestamp NULL DEFAULT CURRENT_TIMESTAMP,
`updatedAt` timestamp NULL DEFAULT CURRENT_TIMESTAMP,
PRIMARY KEY (`id`)
) ENGINE=InnoDB DEFAULT CHARSET=utf8mb4;
CREATE TABLE `wl_Users` (
`id` int(11) unsigned NOT NULL AUTO_INCREMENT,
`display_name` varchar(255) NOT NULL DEFAULT '',
`email` varchar(255) NOT NULL DEFAULT '',
`password` varchar(255) NOT NULL DEFAULT '',
`type` varchar(50) NOT NULL DEFAULT '',
`label` varchar(255) DEFAULT NULL,
`url` varchar(255) DEFAULT NULL,
`avatar` varchar(255) DEFAULT NULL,
`github` varchar(255) DEFAULT NULL,
`twitter` varchar(255) DEFAULT NULL,
`facebook` varchar(255) DEFAULT NULL,
`google` varchar(255) DEFAULT NULL,
`weibo` varchar(255) DEFAULT NULL,
`qq` varchar(255) DEFAULT NULL,
`2fa` varchar(32) DEFAULT NULL,
`createdAt` timestamp NULL DEFAULT CURRENT_TIMESTAMP,
`updatedAt` timestamp NULL DEFAULT CURRENT_TIMESTAMP,
PRIMARY KEY (`id`)
) ENGINE=InnoDB DEFAULT CHARSET=utf8mb4;
腾讯云开通cdn以及备案(具体步骤自行百度)
github部署hexo
采用双库进行部署,其中一个库设置为私有库(用于hexo发布),一个库设置为公开库(博客库)
hexo 初始化 https://hexo.io/zh-cn/docs/
github actions发布
主要修改下面这两句里面的用户名、邮箱和token。
git -c user.name='landv' -c user.email='landvcn@qq.com' commit -m '提交博客源码'
git remote add origin https://${{secrets.HEXO_DEPLOY}}@github.com/landv/landv.github.io.git
1
2
3
4
5
6
7
8
9
10
11
12
13
14
15
16
17
18
19
20
21
22
23
24
25
26
27
28
29
30
31
32
33
34
35
36
37
38
39
40
41
42
43
44
45
46
47
48
49
50
51
52
53
54
55
56
57
58
59
60
61
62
63
64
65
66
67
68
69
70
71
72
73name: 自动部署hexo
on:
push:
branches: [main]
jobs:
build:
runs-on: ubuntu-latest
steps:
- name: 1. 检出分支
uses: actions/checkout@v3
- name: 2. 安装 Node
uses: actions/setup-node@v3
with:
node-version: 16
- name: 3. 安装 Hexo
run: |
export TZ='Asia/Shanghai'
npm install hexo-cli -g
- name: 4. 缓存 Hexo
uses: actions/cache@v1
id: cache
with:
path: node_modules
key: ${{runner.OS}}-${{hashFiles('package.json')}}
- name: 5. 安装依赖
if: steps.cache.outputs.cache-hit != 'true'
run: |
npm install --save
- name: 6. 生成静态文件
run: |
hexo clean
hexo generate
# hexo algolia
- name: 7. 推送到github公共仓库
working-directory: ./public
run: |
git init
git checkout -b main
git add .
git -c user.name='landv' -c user.email='landvcn@qq.com' commit -m '提交博客源码'
git remote add origin https://${{secrets.HEXO_DEPLOY}}@github.com/landv/landv.github.io.git
git push origin main -f -q
# - name: 8. 推送到服务器私有仓库 #没有使用服务器可删除该步骤
# uses: easingthemes/ssh-deploy@v2.0.7
# env:
# SSH_PRIVATE_KEY: ${{ secrets.SERVER_ACCESS_TOKEN }} #服务器生成的私钥,例如 -----BEGIN RSA PRIVATE KEY-----xxxx-----END RSA PRIVATE KEY-----
# ARGS: "-avz --delete" # rsync参数
# SOURCE: "public/"
# REMOTE_HOST: ${{ secrets.SERVER_HOST }} #服务器ip地址,例如 1.2.3.4
# REMOTE_USER: ${{ secrets.SERVER_USER }} #登录用户,例如 root
# TARGET: ${{ secrets.SERVER_TARGET }} #服务器目录,例如 /www/blog.panghai.top
# EXCLUDE: ".git/"
# - name: 9. 安装 Python #没有使用腾讯云cdn可删除该步骤
# uses: actions/setup-python@v1
# with:
# python-version: 3.8
# - name: 10. 安装依赖
# run: |
# pip install --upgrade pip
# pip install tencentcloud-sdk-python
# pip install tencentcloud-sdk-python-cdn
# - name: 11. 刷新腾讯云cdn #没有使用腾讯云cdn可删除该步骤
# run: |
# python cdn.py
# https://blog.panghai.top/posts/a24c5846/#%E6%96%B0%E5%BB%BAAction前往 github settings 生成 token,权限需要有 repo、workflow
参考文章:https://cloud.tencent.com/developer/article/1720500
https://blog.panghai.top/posts/a24c5846/#%E6%96%B0%E5%BB%BAAction
当然你也可采用云函数、服务器、本机模式进行提交。
博客美化(使用hexo-theme-butterfly主题进行美化)
hexo项目引用依赖
1
2
3
4
5
6
7
8
9
10
11
12
13
14
15
16
17
18
19
20
21
22
23
24
25
26
27
28
29
"dependencies": {
"@neilsustc/markdown-it-katex": "^1.0.0",
"hexo": "^6.3.0",
"hexo-abbrlink": "^2.2.1",
"hexo-asset-image": "github:landv/hexo-asset-image#20230227",
"hexo-blog-encrypt": "^3.1.6",
"hexo-browsersync": "^0.3.0",
"hexo-deployer-git": "^4.0.0",
"hexo-generator-archive": "^2.0.0",
"hexo-generator-baidu-sitemap": "^0.1.9",
"hexo-generator-category": "^2.0.0",
"hexo-generator-feed": "^3.0.0",
"hexo-generator-index": "^3.0.0",
"hexo-generator-search": "^2.4.3",
"hexo-generator-sitemap": "^3.0.1",
"hexo-generator-tag": "^2.0.0",
"hexo-lazyload-image": "^1.0.13",
"hexo-renderer-ejs": "^2.0.0",
"hexo-renderer-jade": "^0.3.0",
"hexo-renderer-marked": "^6.0.0",
"hexo-renderer-pug": "^3.0.0",
"hexo-renderer-stylus": "^2.1.0",
"hexo-server": "^3.0.0",
"hexo-tag-aplayer": "^3.0.4",
"hexo-theme-landscape": "^0.0.3",
"hexo-wordcount": "^6.0.1",
"js-yaml": "^4.1.0",
"markdown-it-checkbox": "^1.1.0"
}
博客美图
 微信
微信- 支付宝
- QQ